This DIY post has three components. First, we will go over the transformation of our red brick fireplace to white washed fireplace. Second, we will discuss balancing the mantle. Finally, I’ll show you what I did to create an inexpensive temporary anchor piece for the mantle!
White Washing Your Fireplace
I absolutely adore original charm. Unfortunately, original elements sometimes clash with what I have pictured for my home. Our gorgeous red brick fireplace is a perfect example of this. David and I are obsessed with gray and white for every room in our new home. (Did you know gray is the new neutral?) Navy is our added color of choice for our living room, so the red had to go. Here is the before:
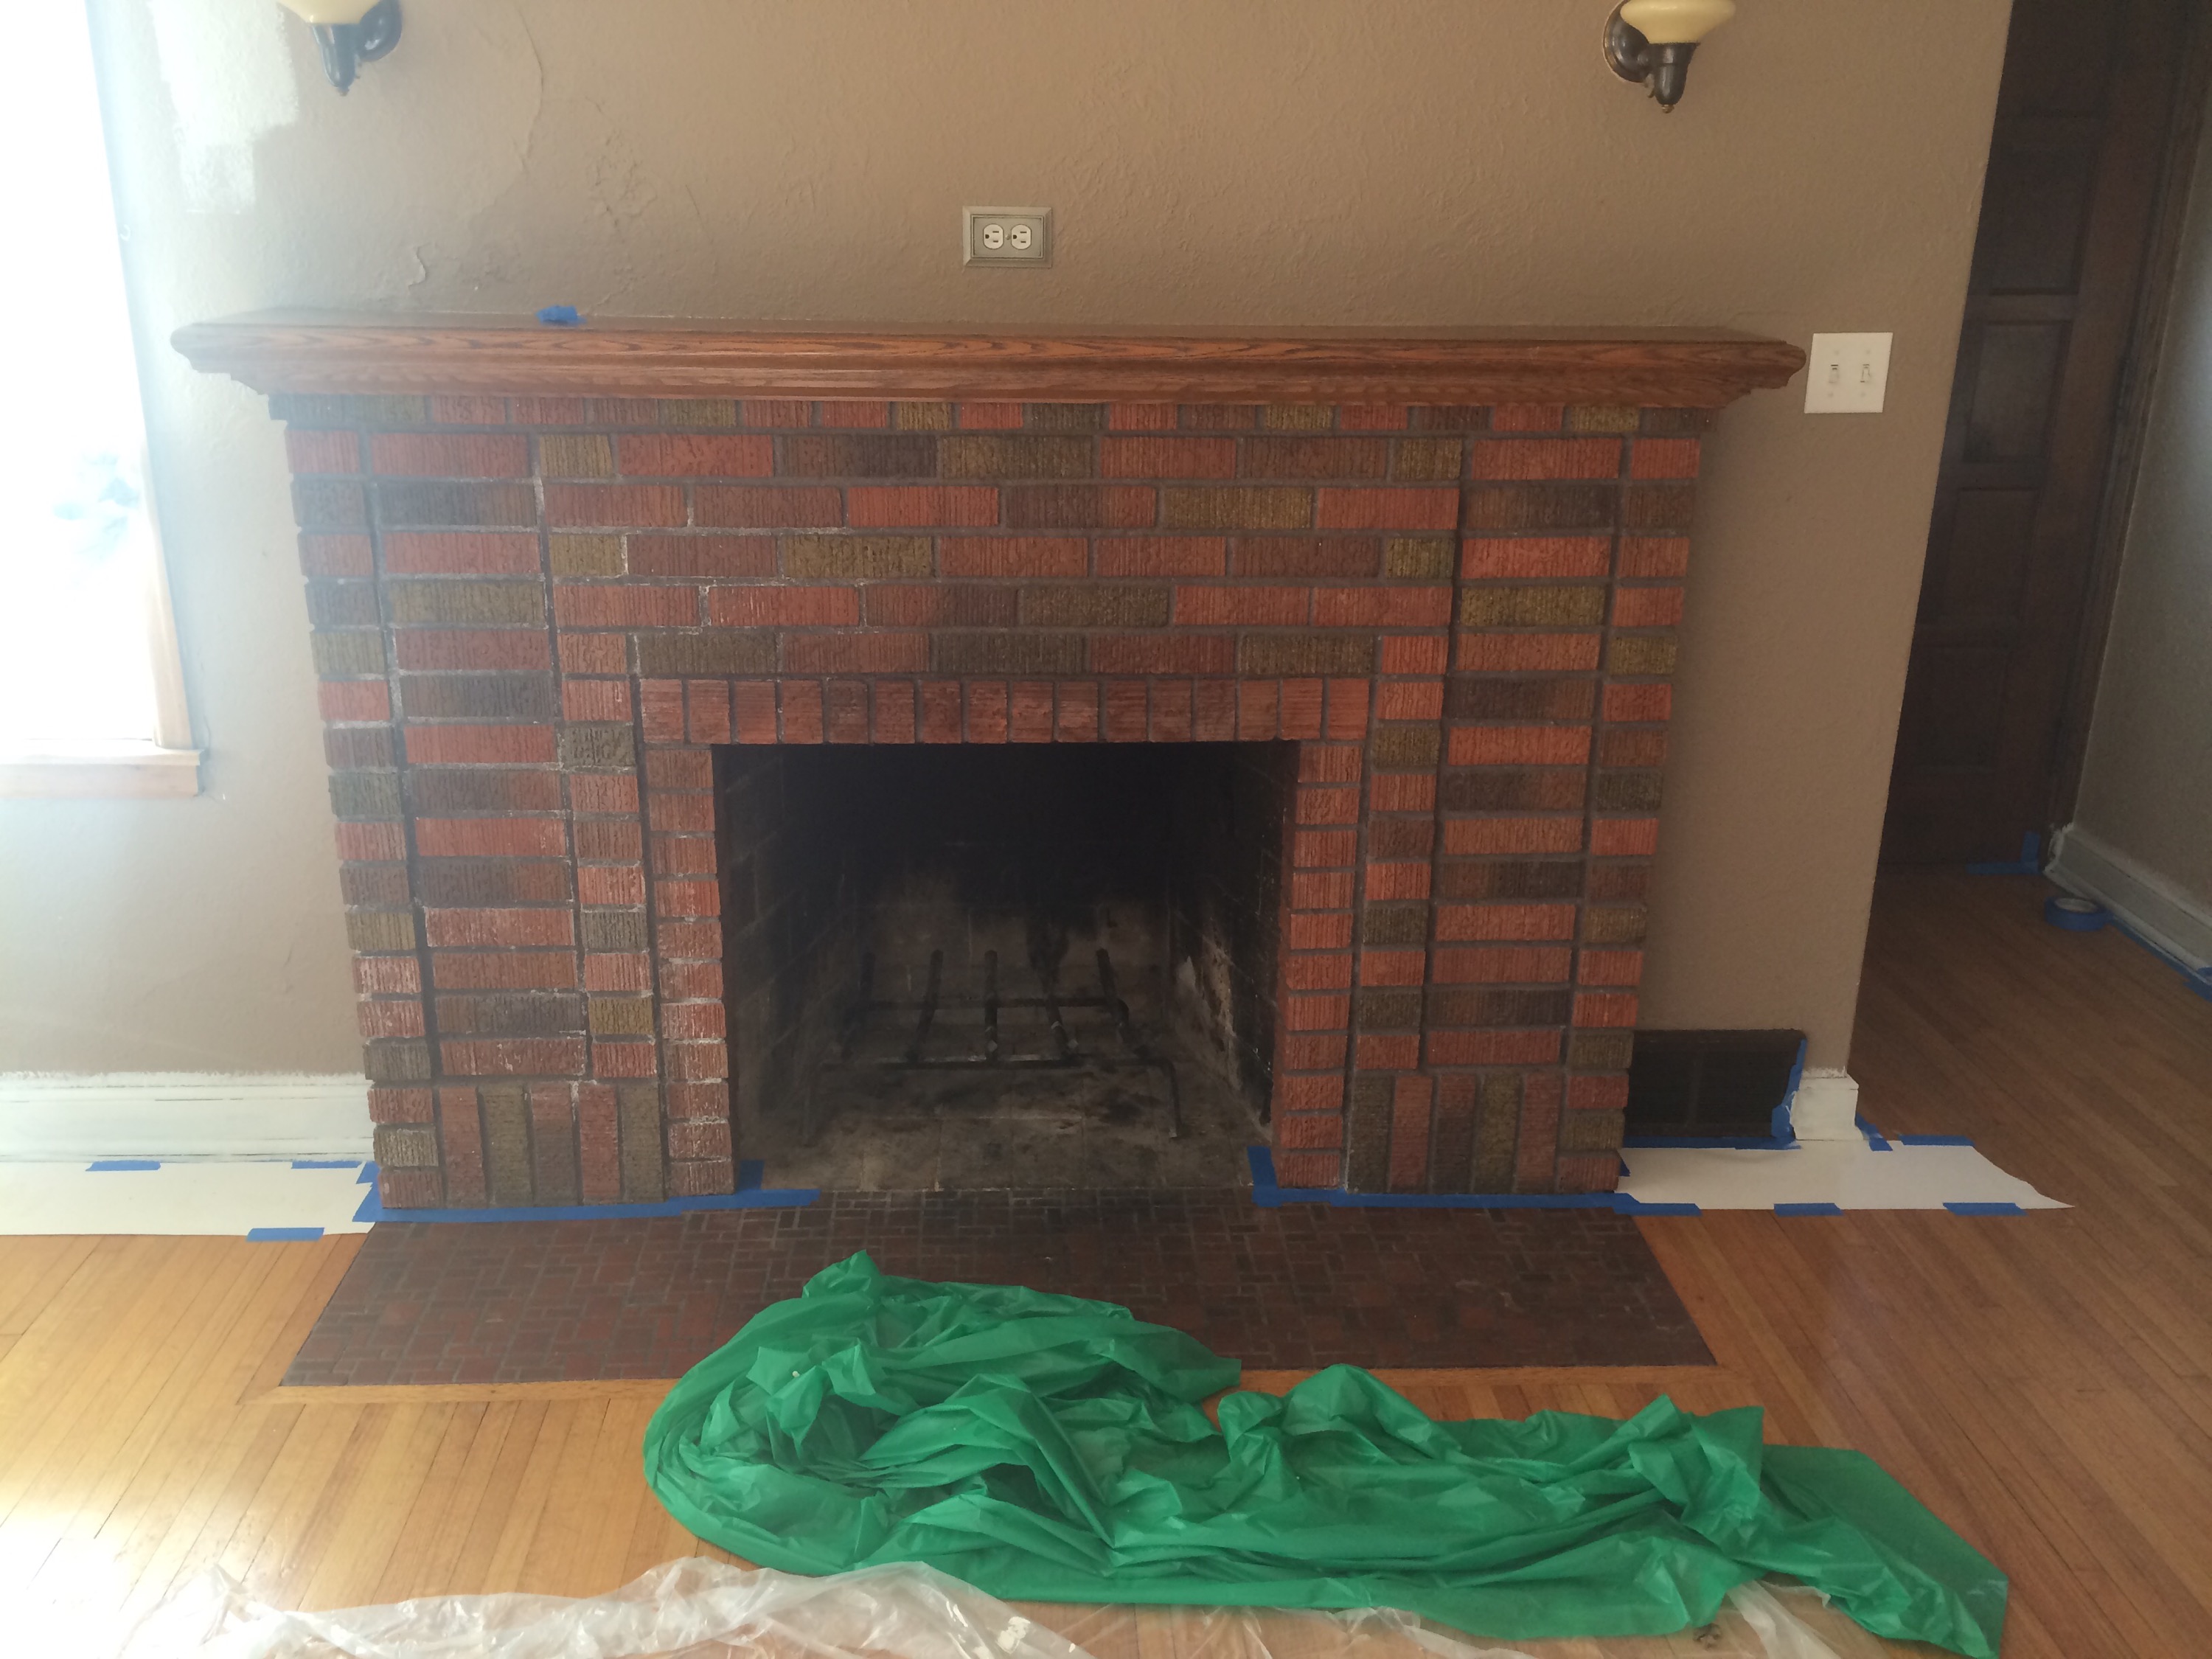
Take note of the original sconces above, as well. More on that later.
This project was easy but messy.
You’ll need:
- A cheap paint brush
- Some old rags and towels
- Painters tape
- Paint
- Water
- A bowl
- Drop cloth
You’ll want to begin by vacuuming the brick with a hose attachment. We didn’t wash it, but vacuuming it allowed us to remove any cobwebs or loose debris. We lightly taped up the brick so we wouldn’t get straight paint on it when we painted the mantle. You’ll also want to secure a drop cloth around the base as this can get quite messy.
Our first step was to paint the mantle white. We used Sherwin Williams trim and door paint with a satin finish. (We also primed with an oil-based Zinsser primer).


Once the mantle was dry we removed the tape. Now the “fun” part.
In your bowl, mix some paint with a little water. Only add a little bit at a time. You’re looking for a glue-like thickness, and a little bit goes a long way.
One to three bricks at a time, apply the paint mixture with your brush, then immediately dab the brick with one of your rags. Doing this helps the warmth come through and helps the paint soak into the crevices of the brick.


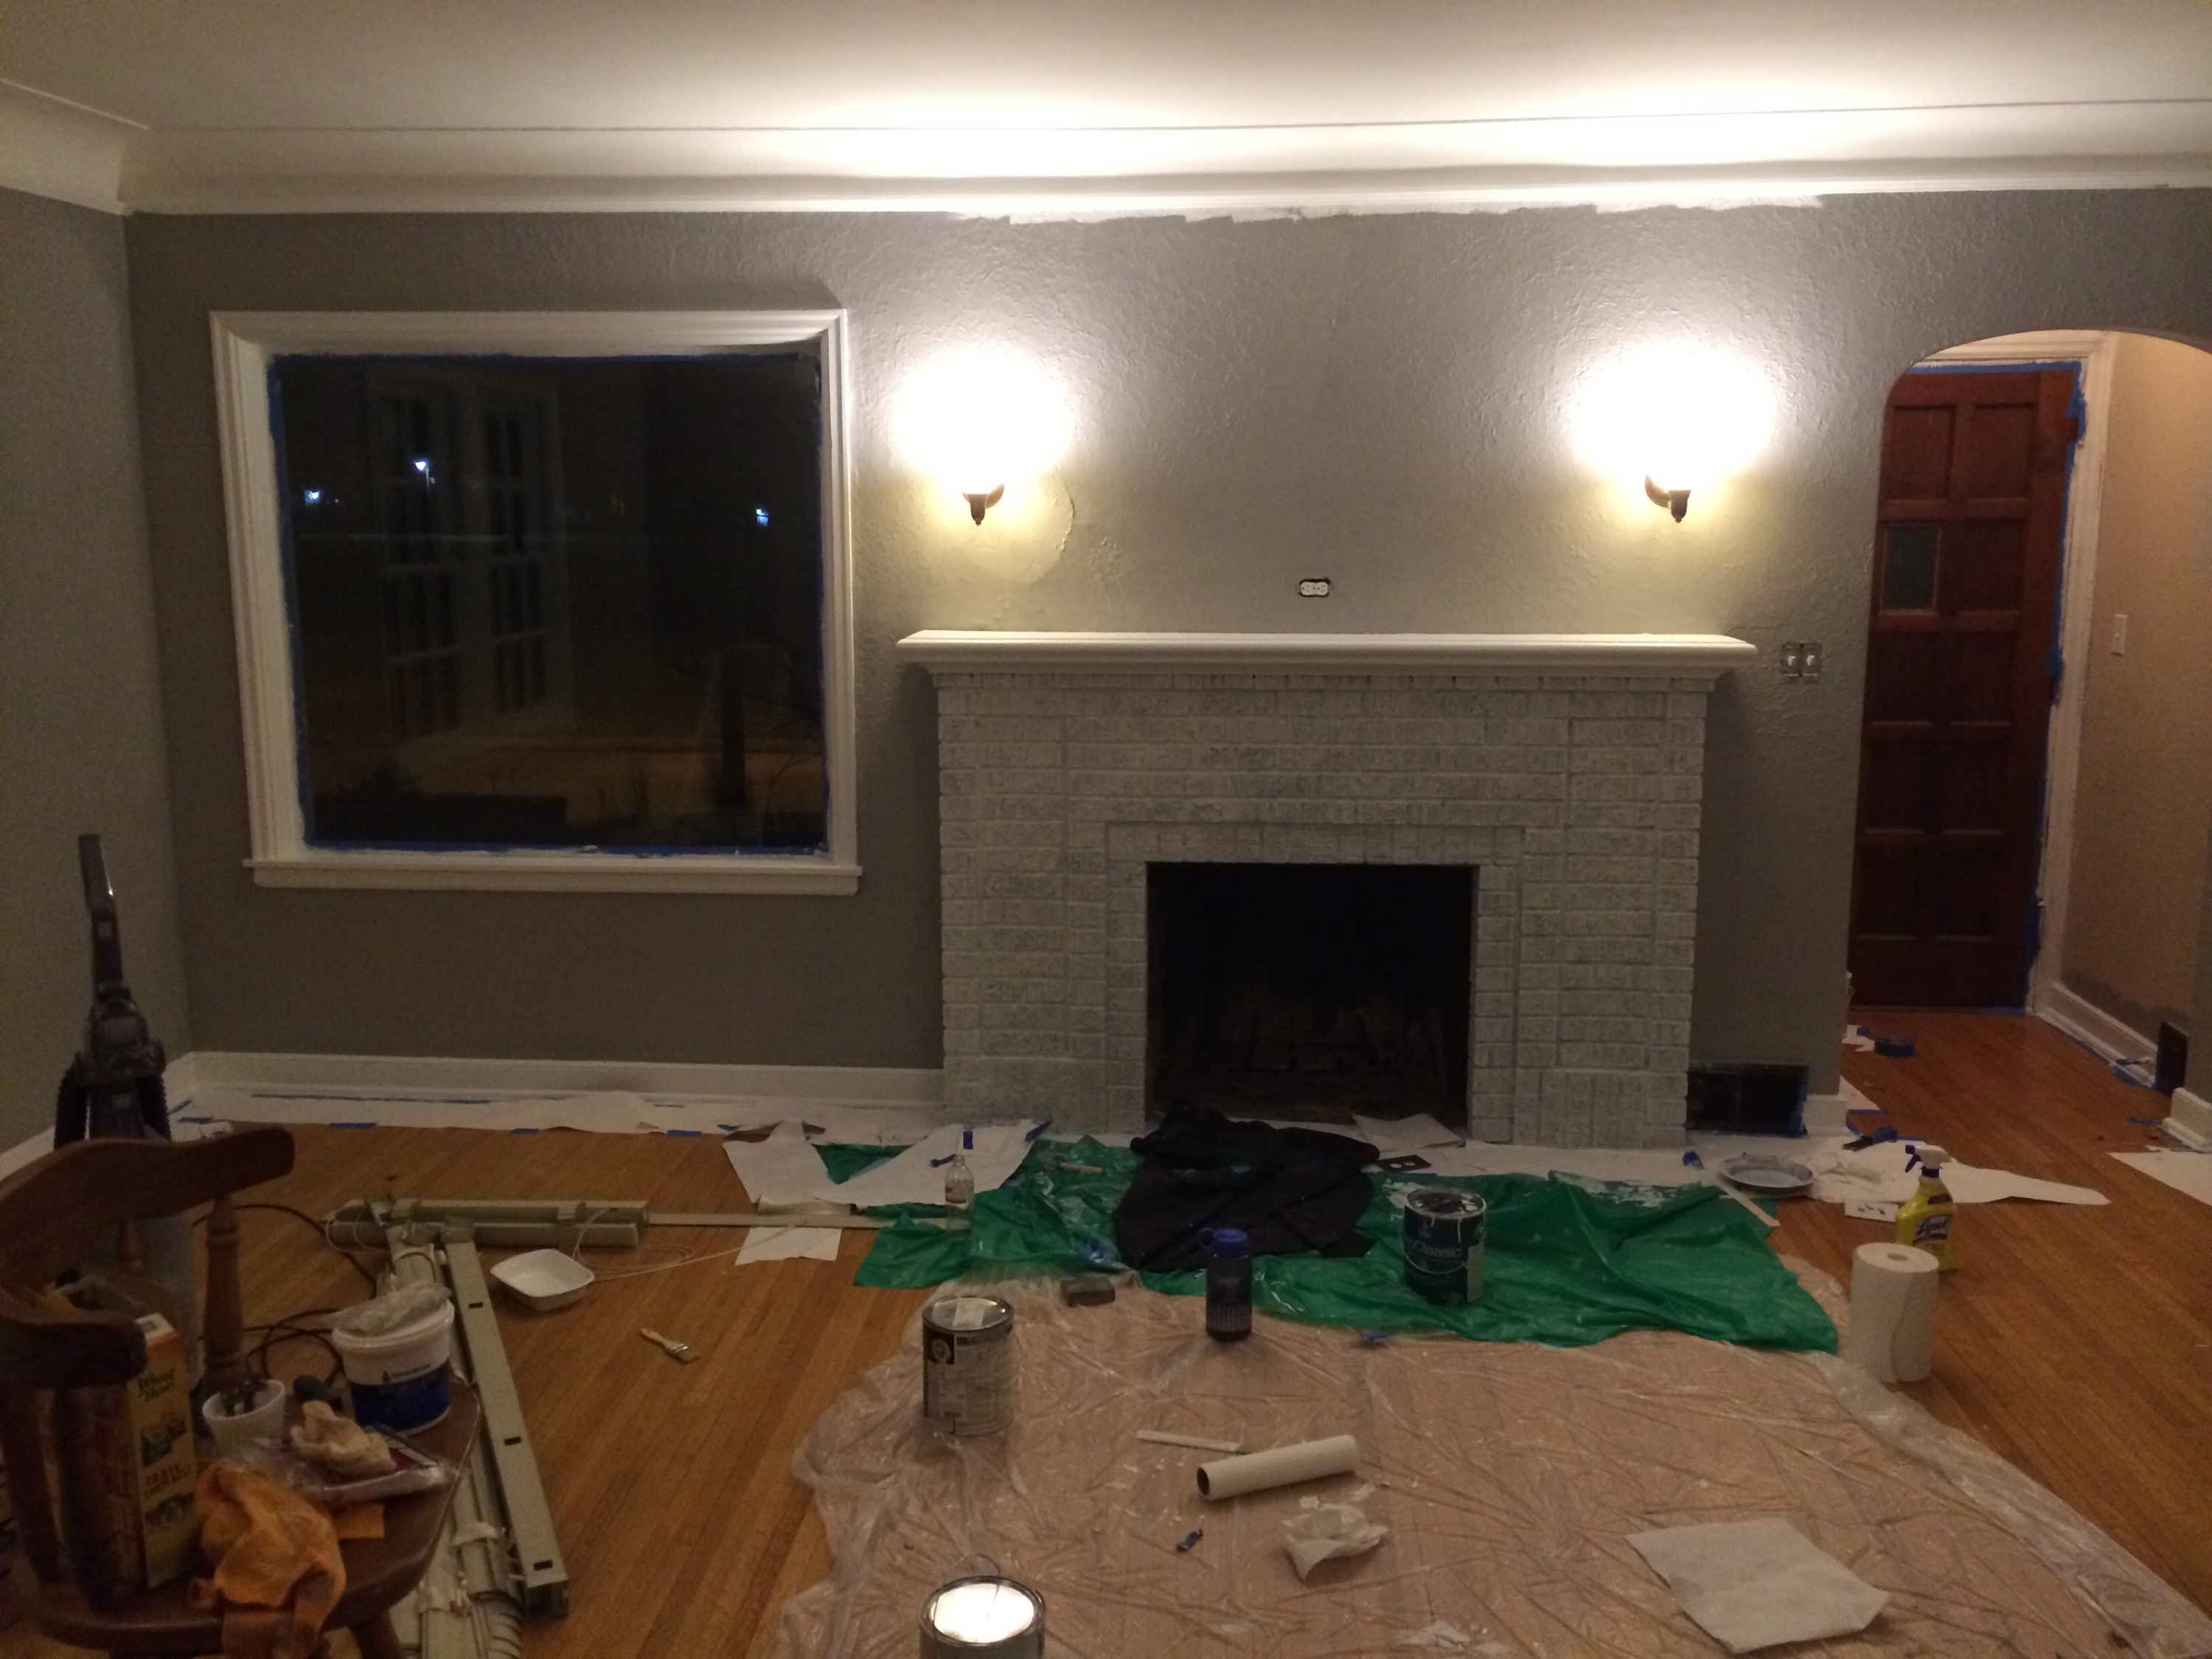
As pictured above, it took us three coats to get to our desired “whiteness”. You can stop sooner or add another coat to your liking.
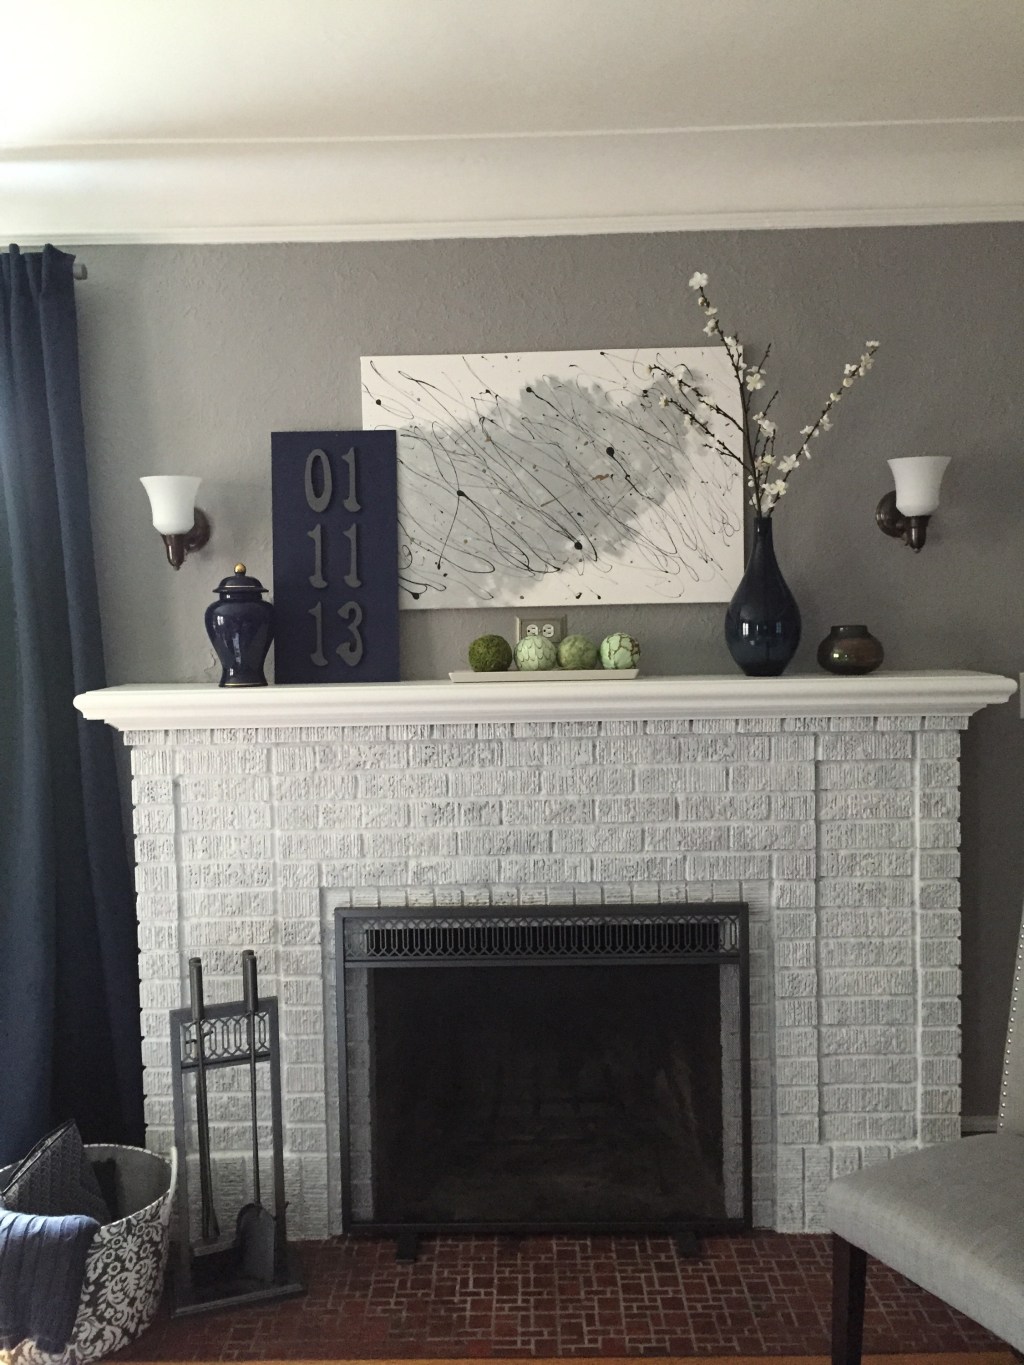
We love the end product!!
Balancing The Mantle
Let’s be honest… Half the fun of having a mantle is that you get to decorate it. (I’m not alone in thinking so, am I?)
There is a correct and incorrect way to decorate a mantle. I did a LOT of research on this subject since the fireplace is the focal point in our living room, and I want it to look right.
A correctly decorated mantle has three must-have components:
- Anchor
- Weight
- Fill
Technically there are other important components such as movement and layering; but I’m starting simple and plan to decorate my mantle many different ways. For our purposes, I’m going to focus on these three.
Anchor: The anchor is a large piece (mirror, clock, window, art, etc) that you place in the middle of your mantle. It quite literally “anchors” the rest of your pieces and pulls them all together.
I chose a piece of art as my anchor. I had visioned a large window but couldn’t find one I liked before our open house. I must add- I found some great windows in a crawl space in our house that I will use in the future!
Weight: The weight of your mantle can be so many different things! I chose some additional art and bases in varying sizes. The weight should be on the sides of your anchor and should draw your eyes downward, creating a triangle.
Fill: The last step is to add fill to your mantle. This helps to create a completed, interesting, cohesive look to your mantle. We chose some green balls on a platter (you can purchase the same ones here!). Our colors are gray, white, and navy; so the green in the balls and the gold flecks in the painting add warmth to the room, among a few other pieces that I will post about in the future.
Here is our current end result. I will most definitely keep changing it and will continue adding to the complexity of it; but for now, keeping it simple and put together is exactly what the room needs.

One last touch you can add to warm the room and complete the look is to add some simple decor at the base. We have our poker set and a basket with a throw blanket. And our diapering necessities… Haha!
DIY Artwork Anchor
As I mentioned above, I would love to use some old windows as my anchor. Since I didn’t have any in time, I decided to take matters into my own hands. A Michaels had just opened a few miles away, so I took advantage of their sales and got a large canvas at 50% off. I ended up paying $12.50. My mother in law had some gold and navy paint, and I had some metallic gray paint leftover from past projects.
I practiced my “painting” on ripped up paper bags until I got the abstract look I was searching for. I tried a lot of different patterns using paper plates, pencil erasers, utinsles, cups and yes, even marshmallows.
The method I was:
- Sponge on the metallic gray until the pattern looks interesting and completed.
- Splatter on the navy blue with a sponge paint brush and drizzle lightly.
- Splatter gold lightly with plastic fork.
And there you go! Abstract art that is 100% original for an easy-on-the-pocketbook $12.50.

Next time: Upcycled coffee table for $23!

Leave a comment